Instructions to Sew a Zipper Into Clothing
Zippers can be a standout amongst the most threatening strategies for another person to sewing. Be that as it may, truly, there is nothing to fear. Putting in a zipper truly isn't as hard as it looks. When you take in the traps, you'll be certainly sewing zippers into everything from dresses and jeans to sacks and pads.

Things You'll Need :
? Zipper (2 inches longer than required)
? Iron and pressing board
? Straightforward tape
? Zipper foot
? Crease ripper
? Sharp scissors

Step 1
With the correct sides of your texture together, sew the zipper opening with a seasoning fasten and a 1/2-inch crease recompense.

Tip
A seasoning line is the longest fasten length on your machine.
Step 2
When you get to the finish of the zipper opening, back line a couple of times and keep on sewing whatever is left of the crease with a medium line length.

Step 3
Press the whole crease open with an iron.

Step 4
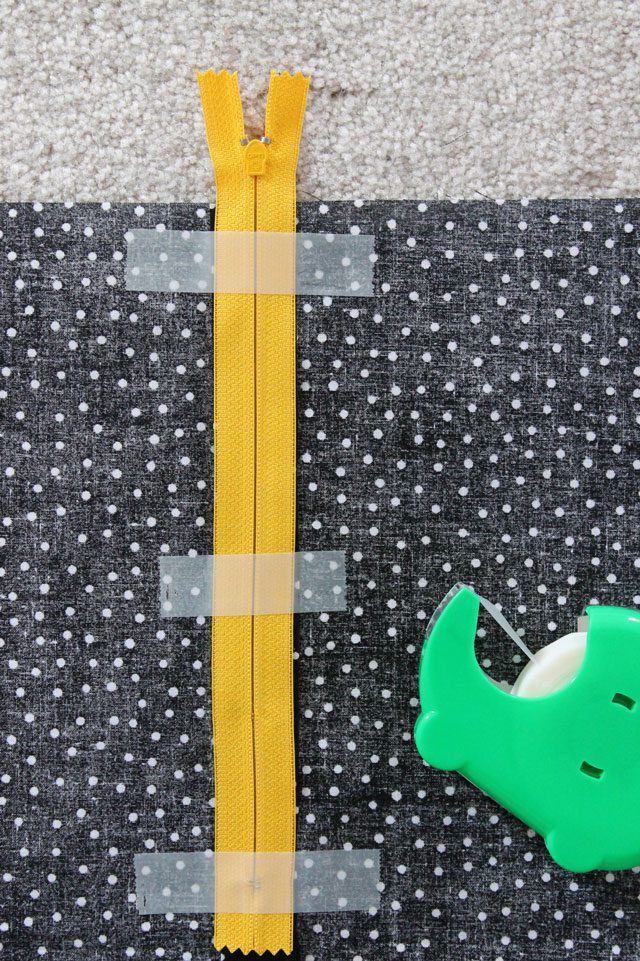
Turn your texture so the wrong side is confronting up. Place the correct side of the zipper onto the crease recompense, with the highest point of the zipper stretching out past the edge of the texture. By broadening the zipper, you wipe out the issue of sewing around the cumbersome zipper pull. You will trim the additional zipper tape later. The base of the zipper ought to be even with the finish of your treating lines, and the teeth of the zipper ought to be agreed with the crease line. Utilize straightforward tape to hold the zipper set up.
Step 5
Take the general foot off of your machine and supplant it with a zipper foot.

Step 6
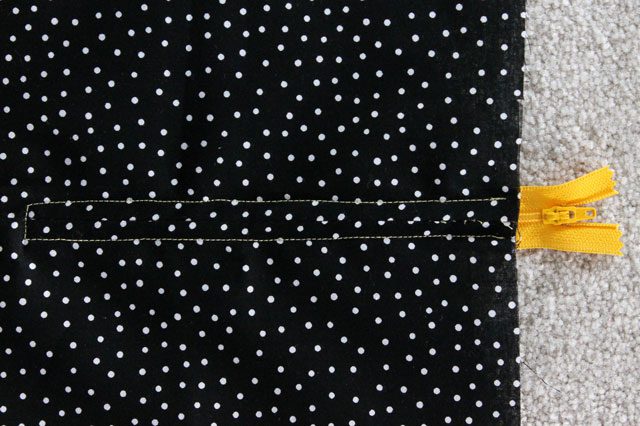
Turn your texture over to the correct side (with the zipper taped under the texture) and sew 1/4 inch from the edge of the zipper crease. When you get to the finish of the seasoning join, leave the needle down in the texture, lift the presser foot, turn the texture, put the presser foot down and sew over the base of the zipper stop. You might need to check this spot with a stick.

Step 7
When you get 1/4 inch far from the zipper crease, leave the needle down once more, lift the presser foot, turn the texture, and put the presser foot down.

Step 8
Sew move down the opposite side of the zipper crease.
Step 9
Utilize a crease ripper to evacuate the treating join along the crease.

Step 10
Evacuate the straightforward tape.

Step 11
Open the zipper a couple of inches.

Step 12
Change the settings on your machine to the zero line length and the medium crisscross line.


Step 13
Utilize the zero length crisscross line to sew over the teeth on the two sides of the zipper to make another zipper stop. This will likewise keep the zipper pull from falling off the teeth when you remove the abundance zipper tape.

Step 14
Utilize a sharp match of scissors to remove the abundance zipper tape over the fastens.

It's just plain obvious, there's not something to fear - it's as simple as that. Presently get out there and demonstrate those zippers who's supervisor!

source:ehow.com by:Beth Huntington